Stylish Crochet Beanie Pattern Free You’ll Love
Video Tutorial Included
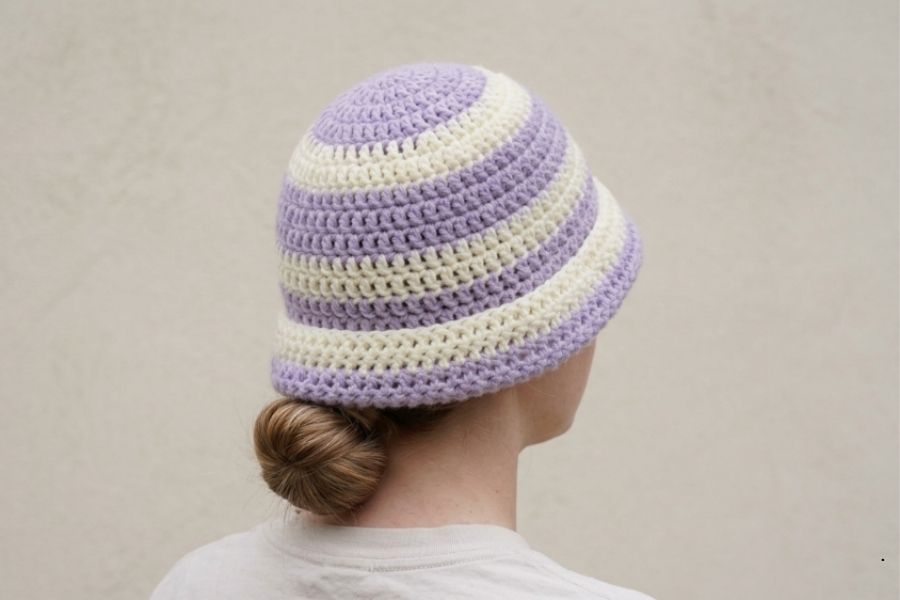
Crafting a cozy custom winter accessory is simple with this free, beginner-friendly crochet beanie pattern. Worked from the top down in the round, the design allows you to easily adjust sizing and style.
You can make a sleek, solid-color beanie or create bold stripes, finished with either a clean edge or a classic fold-up brim.
Materials and Tools
Before beginning, gather the following supplies:
- Yarn: Approximately 70 g total of medium-weight yarn. The sample features brushed acrylic yarn in cream and lilac dew.
- Crochet Hook: 5.5 mm hook (or size recommended by your yarn label).
- Scissors
- Yarn Needle
Round 1
- Start by making a slip knot with your first color, leaving a 4-inch tail.
- Chain 4.
- Insert your hook into the first chain made (on the far left), going through the “V” and under the back loop so you have two loops on top of your hook. Pull the chains slightly away from the hook to expose the center space, yarn over, and pull through all loops to form a ring.
- Chain 2 to start the round.
- Work 10 double crochets directly into the center of the ring. (To double crochet: yarn over, insert hook into the ring, yarn over, pull through, yarn over, pull through two loops, yarn over, pull through the remaining two loops). If the ring gets crowded, slide the stitches to the right.
- Pull the initial tail end firmly to close the center hole.
- Close the round by slip stitching into the top “V” of the very first double crochet made (ignoring the beginning chain-2). Pull tight.
Round 2
- Chain 2 to begin.
- Work an increase (two double crochets into the exact same stitch) in every stitch around. Start directly in the first stitch where you just made your closing slip stitch.
- Continue placing two double crochets into each “V” stitch around the circle.
- Slip stitch into the first double crochet of the round to close. You should have a total of 20 stitches.
Round 3
- Chain 2 to begin.
- Work 1 double crochet into the first stitch.
- Work an increase (2 double crochets) into the second stitch.
- Repeat this alternating pattern (1 double crochet, then 1 increase) all the way around.
If you are making a striped beanie, stop before finishing the final loop of the very last double crochet to switch colors. Pull the new color through the final two loops of the stitch, leaving a 4-inch tail. When slip stitching to close the round, drape the unused yarn color over your hook before completing the slip stitch to cleanly carry the yarn upward.
Round 4 and Round 5 (Increasing the Crown)
To keep expanding the flat top circle, continue pushing the increase placement out by one stitch each round. Each completed round adds exactly 10 stitches to your total count:
- Round 4: Chain 2. Work 1 double crochet into the first two stitches, then work an increase into the third stitch. Repeat this sequence around. Close with a slip stitch (carrying the unused yarn over the hook if changing colors). Total: 40 stitches.
- Round 5: Chain 2. Work 1 double crochet into the first three stitches, then work an increase into the fourth stitch. Repeat this sequence around. Change back to your primary color on the final stitch loop. Total: 50 stitches.
Sizing Adjustments
The final size of your beanie depends on the diameter of your flat crown circle. You can easily adjust the pattern for different head sizes by continuing or stopping the increase rounds:
- Small (Approx. 52 cm): Complete 6 total rounds (Round 6 consists of 1 double crochet in the first four stitches, then an increase in the fifth, totaling 60 stitches).
- Medium: Complete 7 total rounds (increasing every 6th stitch).
- Large: Complete 8 total rounds (increasing every 7th stitch).
Always maintain your color sequence if striping (the sample alternates 3 rounds of the purple yarn and 2 rounds of the cream yarn).
Building the Height (Body of the Beanie)
Once your crown reaches the desired diameter, stop increasing to build the vertical sides:
- Chain 2.
- Work exactly 1 double crochet into every single stitch around. Do not add any increases.
- Close with a slip stitch at the end of the round.
- Repeat this process round by round, maintaining your established stripe pattern.
Brim Customization and Fastening Off
The number of body rounds you choose dictates the final style and length of your hat:
- No Brim style: Continue until you reach 16 total rounds (approximately 18 cm long). This will sit just above the eyebrows.
- Fold-Up Brim style: Continue until you reach 20 total rounds (approximately 22 cm long) to allow for a 4 cm fold-up cuff.
Once satisfied with the length, chain 1, cut both yarn strands leaving 4-inch tails, and pull the working loop completely through with your hook to tie a secure knot.
Weaving in Loose Ends
- Thread a loose end into your yarn needle.
- Guide the needle down through the structure of the stitch to the base of the final round.
- Pass the needle horizontally under the bottom loops of several adjacent double crochets.
- Drop down one row level, and weave back in the opposite horizontal direction to securely lock the fiber.
- Trim any remaining excess yarn flush against the fabric. Repeat this process for all remaining loose tails on the inside and top of the beanie.
Essential Crochet Tension Advice
Maintaining even tension is incredibly important when working hats in the round. If your stitches start out loose but tighten up as you progress down the body, the beanie may end up funnel-shaped or too tight around the forehead. Try to keep your grip relaxed and your stitches uniform.
Simple Troubleshooting for Stitch Counts
If you find that your beanie edge is turning out wavy or starting to ruffle during the crown expansion, you may have accidentally added extra increases. Counting your stitches at the end of every single round is the best safeguard; ensure your total increases by exactly 10 stitches per round until you reach the vertical body portion.
The below video contains all the steps you need to successfully crochet this beanie.