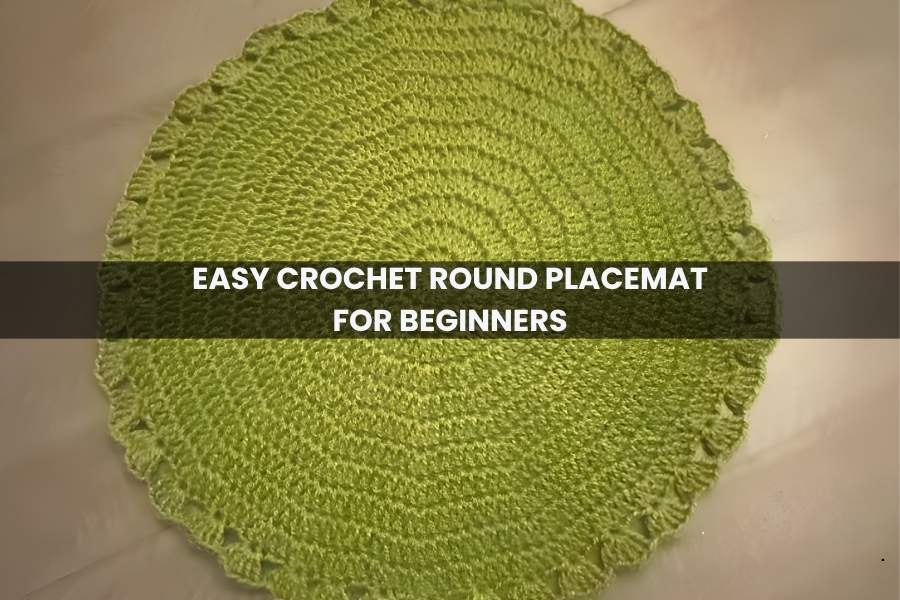
Easy Crochet Round Placemat: A Detailed Beginner’s Guide
Creating your own home décor is one of the most rewarding aspects of learning to crochet. This round placemat is an ideal project for beginners because it focuses on the foundational “increasing circle” technique, which ensures your work stays perfectly flat. By the end of this tutorial, you will have a beautiful, functional table setting and a solid understanding of crochet geometry.
Getting Started
Materials Needed
- Yarn: A medium-weight cotton or cotton-blend yarn is recommended for durability and heat resistance.
- Hook: A size appropriate for your yarn (commonly 5.0 mm or 5.5 mm).
- Tools: Tapestry needle for weaving in ends and scissors.
Core Techniques
- Magic Ring: The best way to start a circle without a hole in the center.
- Double Crochet (DC): The primary stitch used for this project.
- Chain 3 (ch 3): Used at the start of each round; it counts as your first double crochet stitch.
- Slip Stitch (sl st): Used to join the end of a round to the beginning.
Step-by-Step Instructions
The Foundation: Rounds 1 & 2
Round 1: Start with a magic ring. Chain 3 (counts as 1 DC). Work 14 DC into the ring. Pull the tail to close the center tight. Join with a slip stitch to the top of the ch 3. (Total: 15 stitches).
Round 2: Chain 3. Work 1 DC into the same first stitch (this creates your first increase). Work 2 DC into every stitch around. Join with a sl st. (Total: 30 stitches).
Expanding the Circle: Rounds 3 through 11
The secret to a flat placemat is the “increase formula.” In each subsequent round, you will increase the number of single DC stitches between your “2 DC” clusters.
- Round 3: Ch 3, 1 DC in first stitch. 1 DC in next, 2 DC in following. Repeat from * to * around. (Total: 45 stitches).
- Round 4: Ch 3, 1 DC in first stitch. 1 DC in each of the next 2 stitches, 2 DC in following. Repeat around. (Total: 60 stitches).
- Round 5: Ch 3, 1 DC in first stitch. 1 DC in each of the next 3 stitches, 2 DC in following. Repeat around. (Total: 75 stitches).
- Round 6: Ch 3, 1 DC in first stitch. 1 DC in each of the next 4 stitches, 2 DC in following. Repeat around. (Total: 90 stitches).
- Round 7: Ch 3, 1 DC in first stitch. 1 DC in each of the next 5 stitches, 2 DC in following. Repeat around. (Total: 105 stitches).
- Round 8: Ch 3, 1 DC in first stitch. 1 DC in each of the next 6 stitches, 2 DC in following. Repeat around. (Total: 120 stitches).
- Round 9: Ch 3, 1 DC in first stitch. 1 DC in each of the next 7 stitches, 2 DC in following. Repeat around. (Total: 135 stitches).
- Round 10: Ch 3, 1 DC in first stitch. 1 DC in each of the next 8 stitches, 2 DC in following. Repeat around. (Total: 150 stitches).
- Round 11: Ch 3, 1 DC in first stitch. 1 DC in each of the next 9 stitches, 2 DC in following. Repeat around. (Total: 165 stitches).
Adding the Decorative Border
Round 12: The Shell Edge
Now that the placemat has reached its full size, we will add a “shell” border to give it a professional, finished look.
- Chain 3. In the very first stitch, work 4 DC. (Including the ch 3, this creates a 5-stitch shell).
- Chain 1 and skip 3 stitches.
- In the fourth stitch, work 5 DC.
- Repeat: Chain 1, skip 3, 5 DC in next stitch all the way around the edge.
- After the final chain 1, join with a slip stitch to the top of the starting ch 3.
Finishing Touches
- Fasten Off: Cut your yarn, leaving a 6-inch tail. Pull the tail through the final loop to secure it.
- Weaving in Ends: Use your tapestry needle to thread the tail end. Weave it horizontally through the base of the stitches on the back side of the placemat. For extra security, weave in one direction, then back the other way.
- Trim: Snip any excess yarn close to the fabric.
Pro Tip: If your placemat looks slightly wavy or curled, you can “block” it by lightly misting it with water and pinning it flat on a towel until dry. This will set the stitches into a perfect circle.