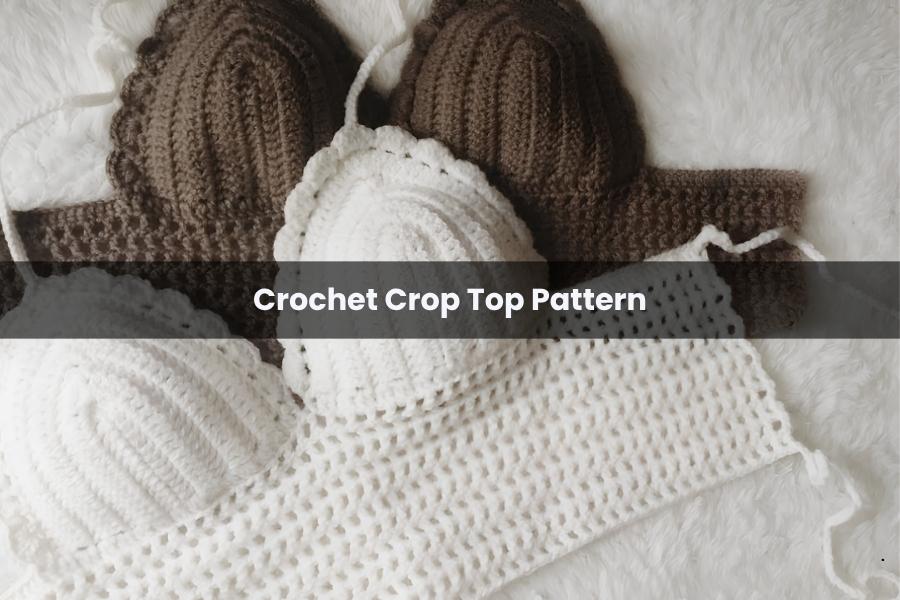
Crochet Crop Top Pattern
Crochet crop tops are a staple of festival fashion and summer wardrobes. Known for their versatility and delicate texture, they are surprisingly simple to create once you master the basic construction of the cups and the bodice. This guide will walk you through creating a customized, bohemian-style crop top with elegant scalloped edges and adjustable straps.
Materials Needed
To ensure a comfortable fit and a professional finish, gather the following supplies:
- Yarn: Weight 4 (Medium/Worsted) yarn. Cotton is highly recommended for tops as it is breathable and holds its shape well.
- Hook: 3.0 mm crochet hook.
- Tools: Scissors and a tapestry needle for weaving in ends.
Phase 1: Crafting the Cups
The cups are worked from the center outward, creating a triangular shape that can be easily adjusted for size.
The Foundation and First Rows
- Start: Make a foundation chain of 16.
- Row 1: Double crochet (DC) into the fourth chain from the hook. DC into every stitch until you reach the very last chain.
- The Increase Point: In the last stitch, work 2 DC, chain 1, and 2 DC all into the same space. This creates the “peak” of your cup.
- The Return: Rotate your work to crochet along the opposite side of the foundation chain. DC into every stitch until the end. Note: Place your final DC into the top of the initial chain-3.
Building the Size
- Row 2: Chain 3 and turn. Skip the first stitch (the chain-3 counts as your first DC). DC into every stitch until you reach the chain-1 space at the peak.
- Peak Increase: In the chain-1 space, work 2 DC, chain 1, and 2 DC.
- Continue: DC in every stitch until the end of the row.
- Repeat: Continue repeating Row 2 until the cup is large enough to provide your desired coverage.
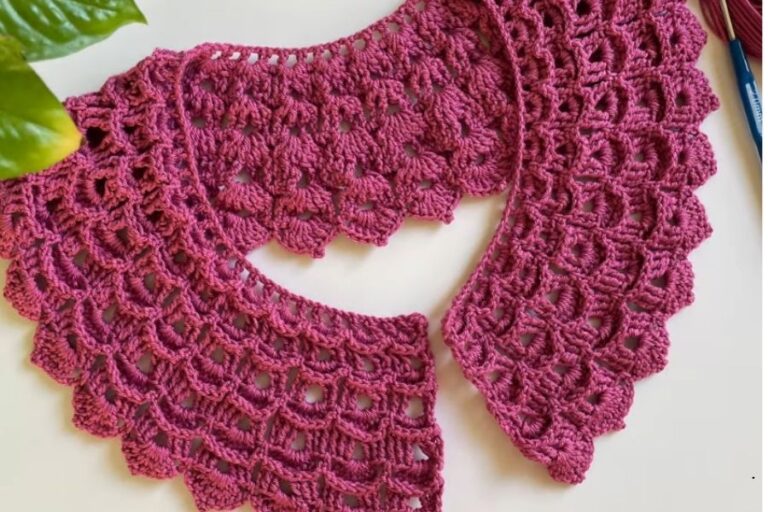
Phase 2: Adding the Scalloped Border
Once your base triangle is complete, add a decorative mesh and scallop edge.
- Mesh Row: Chain 3 and turn. Skip two spaces, then work a half double crochet (HDC) into the next. Chain 1, skip one space, HDC into the next. Repeat this until you reach the peak. Chain 1, skip the peak space, and continue the pattern down the other side.
- Scallop Row: Turn your work (do not chain). Slip stitch into the first mesh space.
- The Shells: In the next mesh space, work 5 DC. Slip stitch into the following space. Repeat this pattern (5 DC in one space, slip stitch in the next) to create a shell border.
- Neck Straps: When you reach the peak of the cup, work 3 DC into the center space, then chain 200. Slip stitch back down the entire length of the chain to create a sturdy strap. Work 2 more DC into that same peak space to finish the shell.
- Finish: Continue the shell pattern down the remaining side. Fasten off and repeat Phase 1 and 2 for the second cup.
Phase 3: Joining the Cups and Creating the Bodice
Connecting the Pieces
- The Side Wing: Start with a fresh chain of 20.
- First Cup: Grab your first cup and work 1 DC into the first available space at the bottom edge. Continue across the bottom of the cup, placing 2 DC into every stitch space along the row. In the very last space of the cup, place only 1 DC.
- The Bridge: Chain 1.
- Second Cup: Pick up the second cup. Place 1 DC in the first space, then 2 DC into every subsequent space across the bottom. Place 1 DC in the final space.
- The Second Wing: Chain 24.
The Bodice Rows
- Base Row: DC into the fourth chain from the hook and into every stitch/chain across the entire piece, including the chain-1 bridge between the cups.
- Mesh Bodice: Chain 4 and turn. Skip one space, DC into the next. Chain 1, skip one, DC into the next. Repeat across.
- Growth: Repeat the Mesh Bodice row until the top reaches your preferred length. For the final DC of each row, place it into the third chain of the turning chain-4.
Phase 4: Final Assembly and Back Straps
The back straps are designed to crisscross or tie directly, allowing for a flexible fit.
- Right Strap: At the corner of your finished bodice, chain 250. Slip stitch back down the chain and fasten off.
- Left Strap: Attach your yarn to the opposite bottom corner of the bodice with a secure knot. Chain 250, slip stitch back down the chain, and fasten off.
- Weaving: Use a tapestry needle to weave in all remaining yarn tails on the inside of the garment.
Styling Tip: This pattern can be transformed into a full-length camisole by simply continuing the bodice rows until it reaches your waist or hips. Pair with high-waisted denim or a flowing maxi skirt for a complete handmade look.