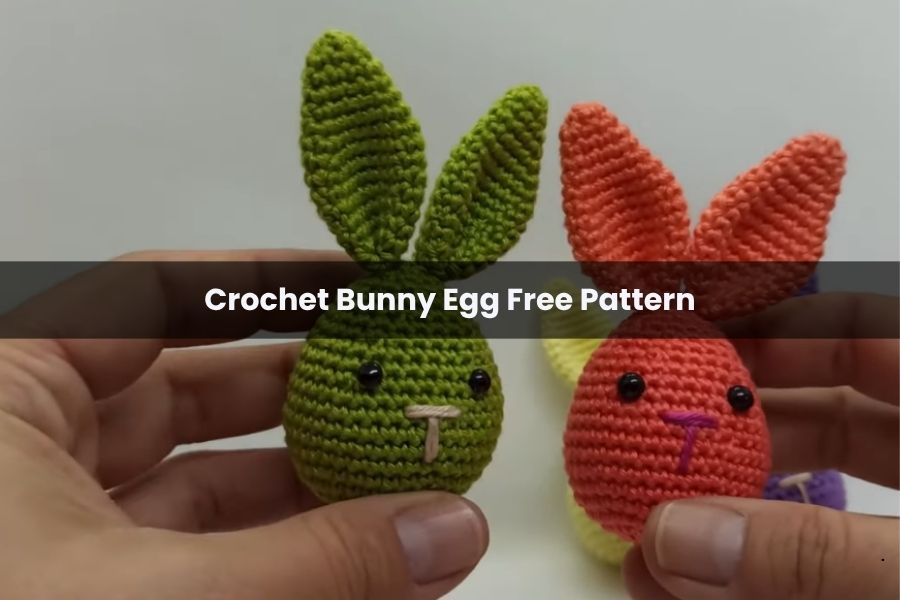
Crochet Bunny Egg Free Pattern
Celebrate the season with these adorable, simple crochet bunny eggs. This project uses basic amigurumi techniques to create a festive decoration or gift. The pattern is designed for cotton yarn, resulting in a clean, structured look, though you can adapt it to any yarn weight with a matching hook.
Supplies Needed
- Yarn: Cotton yarn in your choice of color (plus a small amount of pink or black for the nose).
- Crochet Hook: A size that matches your yarn (typically 2.5mm to 3.5mm for cotton).
- Stuffing: Polyester toy stuffing (fiberfill).
- Eyes:
- Sewing Eyes: Small black beads or buttons (sewn on between Rounds 12 and 13).
- Safety Eyes: If using these, place them between Rounds 12 and 13 (5 stitches apart) before closing the head.
- Tools: Scissors, sewing needle, pins, and a stitch marker.
The Bunny Egg (Body)
The body is worked in continuous spiral rounds. Use a stitch marker to track the last stitch of each round.
- Round 1: Create a magic ring and work 8 sc into the ring. (8)
- Round 2: 2 sc in every stitch around. (16)
- Round 3: [1 sc, 2 sc in next stitch] repeat around. (24)
- Round 4: [1 sc in next 3 stitches, 2 sc in next] repeat around. (30)
- Round 5: [1 sc in next 9 stitches, 2 sc in next] repeat around. (33)
- Round 6: 1 sc in first 5 stitches, 2 sc in next. Then 1 sc in next 10 stitches, 2 sc in next. 1 sc in next 10 stitches, 2 sc in next. 1 sc in last 5 stitches. (36)
- Round 7: [1 sc in next 11 stitches, 2 sc in next] repeat around. (39)
- Rounds 8–9: 1 sc in every stitch around. (39)
Decreasing the Shape
- Round 10: [1 sc in next 11 stitches, sc2tog] repeat around. For a cleaner look, use the invisible decrease (working through front loops only). (36)
- Round 11: 1 sc in every stitch around. (36)
- Round 12: 5 sc, sc2tog, [10 sc, sc2tog] twice, 5 sc. (33)
- Round 13: 1 sc in every stitch around. (33)
- Round 14: [9 sc, sc2tog] repeat around. (30)
- Round 15: 4 sc, sc2tog, [8 sc, sc2tog] twice, 4 sc. (27)
- Round 16: [7 sc, sc2tog] repeat around. (24)
- Round 17: 3 sc, sc2tog, [6 sc, sc2tog] twice, 3 sc. (21)
- Round 18: [5 sc, sc2tog] repeat around. (18)
- Round 19: 2 sc, sc2tog, [4 sc, sc2tog] twice, 2 sc. (15)
Stuffing: Stop here to stuff the egg firmly. Use a wooden stick to help push the stuffing into the corners and shape the egg properly.
- Round 20: [3 sc, sc2tog] repeat around. (12)
- Round 21: [sc2tog] 6 times. (6)
Finishing the Body: Slip stitch in the next stitch. Cut the yarn, leaving a tail. Use a needle to weave the tail through the front loops of the remaining 6 stitches, pull tight to close the hole, and hide the end inside the body.
The Bunny Ears (Make 2)
- Round 1: Magic ring with 6 sc. (6)
- Round 2: [1 sc, 2 sc in next stitch] repeat around. (9)
- Round 3: 1 sc in every stitch around. (9)
- Round 4: [2 sc, 2 sc in next stitch] repeat around. (12)
- Round 5: 1 sc in every stitch around. (12)
- Round 6: [3 sc, 2 sc in next stitch] repeat around. (15)
- Round 7: [4 sc, 2 sc in next stitch] repeat around. (18)
- Round 8: [5 sc, 2 sc in next stitch] repeat around. (21)
- Rounds 9–11: 1 sc in every stitch around. (21)
- Round 12: [5 sc, sc2tog] repeat around. (18)
- Round 13: 1 sc in every stitch around. (18)
- Round 14: [4 sc, sc2tog] repeat around. (15)
- Round 15: 1 sc in every stitch around. (15)
Finishing the Ears: Slip stitch and leave a 30cm tail. Flatten the base of the ear and sew across the opening with a few stitches to pinch the bottom together.
Assembly & Embroidery
The Eyes
If you did not use safety eyes, sew your beads or buttons between Rounds 12 and 13. Space them roughly 5 stitches apart. Knot the yarn securely and hide the ends.
The Nose
The nose is embroidered between Rounds 10 and 11, centered between the eyes.
- Bring your needle through the middle to create a small horizontal bar.
- Bring the needle down vertically from the center of that bar to create a small “Y” or “T” shape.
- Repeat the stitches to make the nose more prominent if desired.
Attaching the Ears
- Position the ears on top of the egg.
- Use pins to hold them in place to ensure they are symmetrical.
- Sew the ears securely to the body using the long yarn tails.
Your Bunny Egg is now finished! These make wonderful table decorations or can be tucked into Easter baskets for a handmade touch.