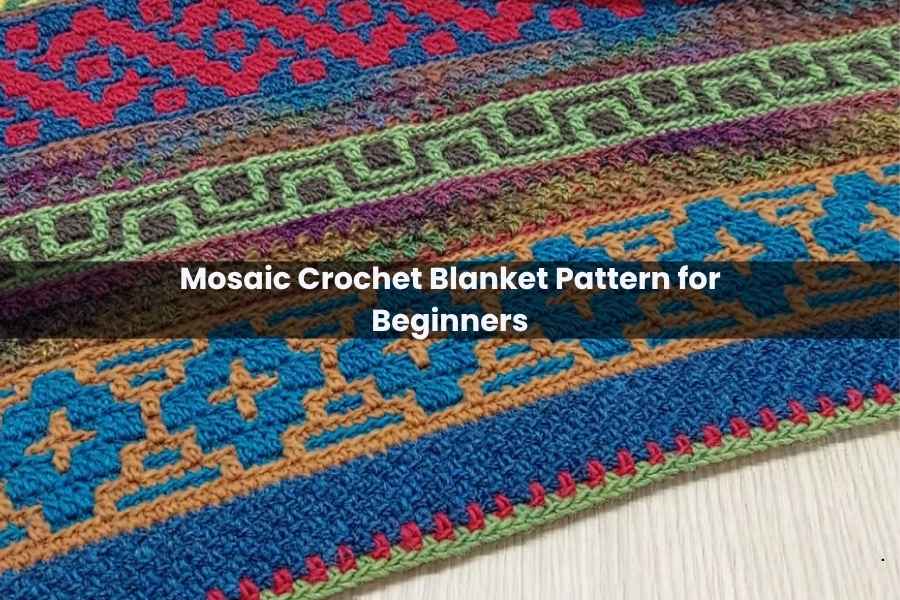
Mosaic Crochet Blanket Pattern for Beginners
Mosaic crochet is a breathtaking technique that allows you to create intricate, geometric patterns without the stress of frequent color changes within a single row. If you have been admiring those complex, tile-like designs, the Mosaic in Marrakesh pattern is the perfect entry point.
This detailed guide covers Part 1 of the pattern, including the foundation, the primary mosaic motif, and the textured separation section.
Getting Started: Tools & Materials
To achieve the look of the original design (approximately 195 stitches wide), you will need the following materials. Note that the yarn amounts listed are for one section of the design; if you wish to repeat the pattern as seen in the full blanket, you will need to double these amounts.
1. Yarn Requirements
- Color A (Background): A light mustard or neutral shade.
- Color B (Pattern): A contrasting blue or dark shade.
- Separation Yarn: A variegated yarn adds a beautiful, effortless transition between sections.
2. Tools
- Hook: 4.0 mm crochet hook.
- Essentials: Stitch markers and sharp scissors.
Foundation: The Long Tail Foundation Chain
The “Mosaic in Marrakesh” design uses a multiple of 24 stitches. While the first part of this specific design relies on a multiple of 12, starting with 24 ensures that all future sections of the blanket align perfectly.
- The Slip Knot: Leave a long tail. The length of the tail determines how many stitches you can make.
- The Process: Wrap the tail around the hook, grab the working yarn, and pull through. Repeat until you reach 192 stitches (8 repeats of 24).
- The Edge: Add 3 more stitches for a total of 195 stitches.
- Finish: Chain one, pull it tight, and fasten off. Leave your tails slightly long until you’ve confirmed your stitch count.
Part 1: The Mosaic Motif
In Overlay Mosaic Crochet, you only work on the right side (RS). You will cut the yarn at the end of every row and start fresh at the beginning.
Key Stitches
- Center Single Crochet (CSC): Worked into the “V” or the legs of the stitch to create a sturdy edge.
- Back Loop Only Single Crochet (BLOSC): The standard stitch for creating the “background.”
- Front Loop Double Crochet (FLDC): Worked into the unworked front loop of the stitch two rows below (of the same color). This creates the overlay pattern.
Step-by-Step Row Instructions
Row 1 (Color A): Start with a standing SC. Work SC into the back part of the foundation chain (leaving the top V unworked). Work SC all across. (195 sts). Fasten off.
Row 2 (Color B): Start with a CSC. Work BLOSC across. End with a CSC. This row establishes the base for your pattern color.
Row 3 (Color A): Start with a CSC.
- Pattern Repeat: 4 BLOSC, 1 FLDC, 3 BLOSC, 1 FLDC, 3 BLOSC.
- Repeat across. End with 1 BLOSC and 1 CSC.
Row 4 (Color B): CSC.
- Pattern Repeat: 5 BLOSC, 3 FLDC, 4 BLOSC.
- Repeat across. End with 1 BLOSC and 1 CSC.
Row 5 (Color A): CSC.
- Pattern Repeat: 2 BLOSC, 1 FLDC, 7 BLOSC, 1 FLDC, 1 BLOSC.
- Repeat across. End with 1 BLOSC and 1 CSC.
Row 6 (Color B): CSC.
- Pattern Repeat: 3 BLOSC, 3 FLDC, 1 BLOSC, 3 FLDC, 2 BLOSC.
- Repeat across. End with 1 BLOSC and 1 CSC.
Row 7 (Color A): CSC.
- Pattern Repeat: 1 FLDC, 5 BLOSC, 1 FLDC, 5 BLOSC.
- Repeat across. End with 1 FLDC and 1 CSC.
Row 8 (Color B): CSC.
- Pattern Repeat: 1 BLOSC, 3 FLDC, 5 BLOSC, 3 FLDC.
- Repeat across. End with 1 BLOSC and 1 CSC.
Row 9 (Color A): Repeat Row 7.
Row 10 (Color B): Repeat Row 6.
Row 11 (Color A): Repeat Row 5.
Row 12 (Color B): Repeat Row 4.
Row 13 (Color A): Repeat Row 3.
Part 2: The Separation Section
To give the eyes a rest between the bold mosaic patterns, we use a textured separation section. Use your Variegated Yarn for all rows in this part.
- Row 1: CSC at the start, BLOSC all across, CSC at the end.
- Row 2: Repeat Row 1.
- Row 3 (The Texture): CSC. Pattern: 1 FLDC, 1 BLOSC. Repeat across. End with 1 FLDC and 1 CSC.
- Row 4: BLOSC all across.
- Row 5 (The Offset): CSC. Pattern: 1 BLOSC, 1 FLDC. Repeat across. This places the FLDC in the gaps of Row 3.
- Row 6: BLOSC all across.
- Row 7: Repeat Row 3.
Pro Tips for Success
Check Your Alignment: Always ensure your FLDC is worked into the stitch of the same color two rows below. If the colors don’t match, you’ve likely missed a stitch.
Don’t Crochet Too Tight: Mosaic crochet can become stiff. Keep your tension even, especially on the edge CSC stitches, to ensure the blanket drapes beautifully.
The Double Border: By using CSC for the first and last stitches of every row, you create a “ladder” effect on the sides. This makes it incredibly easy to attach a double border later, hiding all those yarn tails!