Cute Crochet Pumpkin Free Pattern
Video Tutorial Included
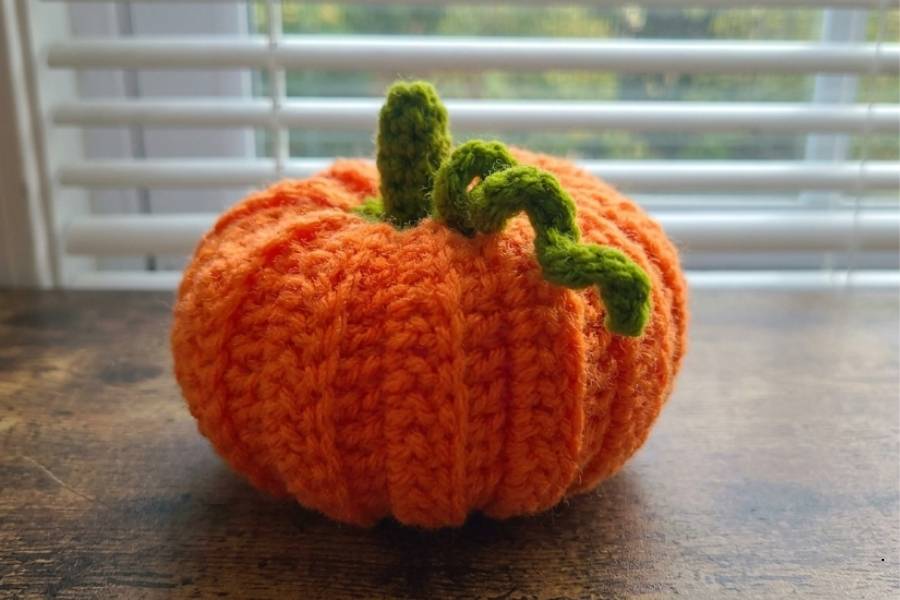
Looking to bring some cozy autumn vibes into your home? This quick and easy crochet pumpkin is the perfect weekend project for your fall decorations. Working up effortlessly with a beautiful textures, it creates a delightfully plump ornament that you can reuse year after year.
Designing the Perfect Pumpkin Shape
Instead of a standard flat rectangle, this clever design uses varied stitch heights to create a natural, tapered silhouette. By using a clever combination of single crochets on the ends and taller double crochets in the center, the fabric naturally bunches into a perfect sphere once assembled.
Building the Ribbed Texture
The body of the pumpkin is worked in rows using an orange medium-weight yarn. To mimic the distinct ridges of a real pumpkin, every row after the first is worked exclusively into the back loops. This simple technique creates a lovely ribbed fabric that bends naturally as the work progresses. A total of 25 rows are completed to give the pumpkin its full circumference.
Assembly and Seamless Joining
Once the main panel is finished, a long tail is used to sew the first and last rows together. By working through the front loops of the final row, the seam blends perfectly into the ribbed texture, making the join virtually invisible. The bottom opening is then gathered tightly in a zigzag fashion, secured with a knot, and stuffed firmly with filling before closing the top.
Crafting the Stem and Vine
No pumpkin is complete without its stem! Swapping to a green yarn, a small cylindrical stem is crocheted in a continuous spiral using a magic ring and single crochets. To add a whimsical touch, a chain is attached to the stem, and multiple single crochets are worked into each chain link, forcing the fabric to curl beautifully into a realistic vine. The base of the stem is then widened and neatly stitched onto the top of the pumpkin.
Tips for the Perfect Plump Pumpkin
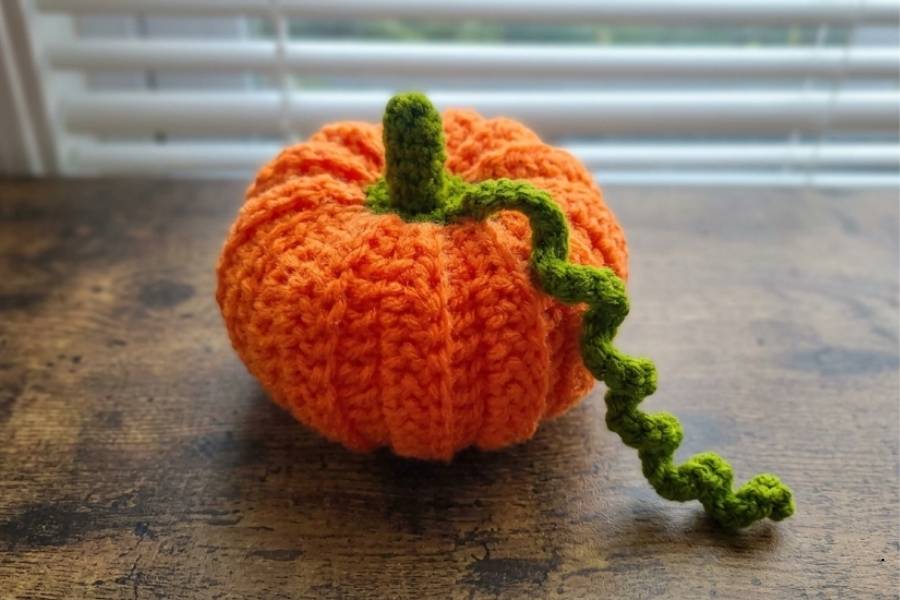
- Tension Matters for Stuffing: Keep your stitches reasonably tight, especially on the single crochet edges, to ensure that your fiberfill stuffing doesn’t peek through the gaps.
- Embrace the Steam: If your ribbed panel feels a bit stiff before assembly, a light steam blocking can help soften the fibers, making it much easier to gather the top and bottom seamlessly.
- Experiment with Color: While classic orange is always a favorite, these pumpkins look incredibly chic in modern autumn palettes like maroon, mustard yellow, olive green, or cream.
- Varying Your Stitches: For a fun variation, you can experiment with different stitches. While tapering creates a classic round shape, working a solid panel of half double crochets will yield a slightly blockier, rustic looking heirloom.
Full Video Tutorial
For a complete visual walkthrough of this project, the below video contains all the steps you need to successfully crochet, stuff, and assemble this festive autumn pumpkin.