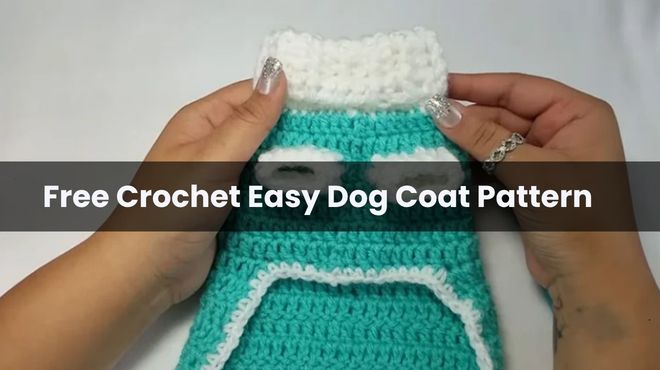
Free Crochet Easy Dog Coat Pattern
Whether it’s a chilly morning walk or just a drafty living room, our furry friends deserve to be as cozy as we are. There is something so special about seeing your pup trot around in something you made with your own two hands.
If you’ve been looking for a project that is quick, practical, and full of heart, this Easy Crochet Dog Coat is it. This design uses basic stitches, making it perfect for beginners or anyone who wants a “palate cleanser” project between more complex blankets.
What You’ll Need
Before we pick up the hook, let’s get your station ready. I personally love using Bernat Super Value because it’s durable and holds up well to a dog’s “zoomies,” but any medium-weight (4) yarn will work beautifully.
The Shopping List:
- Yarn: Medium-weight (4) yarn in your favorite colors.
- Hook Size: 5.5mm (I/9) crochet hook (or whatever size helps you hit the gauge).
- Tools: A trusty tapestry needle for weaving in those ends.
Sizing & Yardage:
Every dog is a different shape, so feel free to use these as a guide and adjust as you go!
| Size | Chest Circumference | Length | Approx. Yardage |
| Small | ~15 inches | ~10 inches | 200 yards |
| Medium | ~18 inches | ~12 inches | 250 yards |
| Large | ~22 inches | ~15 inches | 300 yards |
Pattern Terms to Know
We’re keeping it simple with these standard abbreviations:
- ch: Chain
- sc: Single Crochet
- sl st: Slip Stitch
- BLO: Back Loop Only (This is the secret to that stretchy, ribbed texture!)
Let’s Get Stitching!
1. The Main Body
We’ll start by creating the base. Think of this as the “blanket” part of the coat.
- The Foundation: Create a base chain (ch) that matches the length required for your dog’s size.
- Row 1: sc in the 2nd ch from your hook and in every ch across. Ch 1 and turn.
- Rows 2-10 (or more!): Work sc in each stitch across. Don’t forget your ch 1 and turn at the end of each row.
Personal Tip: Hold the piece up to your dog occasionally. You want this panel to cover their back comfortably!
2. Crafting the Leg Openings
Nobody likes a restrictive coat! We’re going to leave some “armholes” for those paws.
- The Setup: sc across to where you want the first leg opening to start (refer to your sizing measurements).
- First Opening: Chain the number of stitches needed to skip the leg space, skip the same number of stitches on the row below, then continue with your sc to the end.
- The Next Row: On your way back, simply sc into those chain stitches you just made. It creates a clean, sturdy hole.
- Second Opening: Just repeat that same process for the second leg!
3. Edging the Legs
To make the coat look polished, we’ll add a little trim.
- With the Right Side (RS) facing you, join your yarn with a sl st to a leg opening.
- Leg Rnd: Ch 1, and sc evenly all the way around the circle. Sl st to join, fasten off, and repeat for the other side. Try to keep your stitches even so the opening doesn’t “pucker.”
4. Joining the Body
It’s starting to look like a real coat now!
- Fold the coat with the Wrong Side (WS) facing out.
- Using your yarn needle, use a whip stitch along the back seam. This joins the edges to create a tube-like shape that gives the coat its structure. Fasten off and weave in those ends.
5. The Belly Band
We want the coat to stay put, so we’re adding a comfortable band underneath.
- With the RS facing, join your yarn to the bottom edge where the belly section starts.
- Row 1: Ch 1, sc evenly along the edge.
- The Build: Ch 1, turn, and sc in each stitch. Keep adding rows until the band is long enough to comfortably wrap under your dog’s belly.
6. The Finishing Touches: Neck & Leg Bands
To give it that professional, “store-bought” look (but better!), we’ll add some ribbing.
- For the Neck: Join yarn at the neck opening.
- Rnd 1: Ch 1, sc evenly around, sl st to join.
- Rnds 2-4: Ch 1, work sc in the BLO (Back Loop Only) all the way around. This creates a stretchy, ribbed collar. You can add more rounds if you want a cozy turtleneck look!
- For the Legs: Repeat the same BLO process around the leg openings for a snug, comfy fit.
The Big Reveal
Once you’ve finished your last stitch, turn the coat right-side out. Use your tapestry needle to weave in any stray ends—make sure they’re nice and secure so they don’t come undone during a game of fetch.
Now for the best part: The Fitting. Slip it onto your pup, make sure they can move their legs freely, and get ready for the cutest photo op of the year!