Elegant Crochet Shawl Pattern Free
Video Tutorial Included
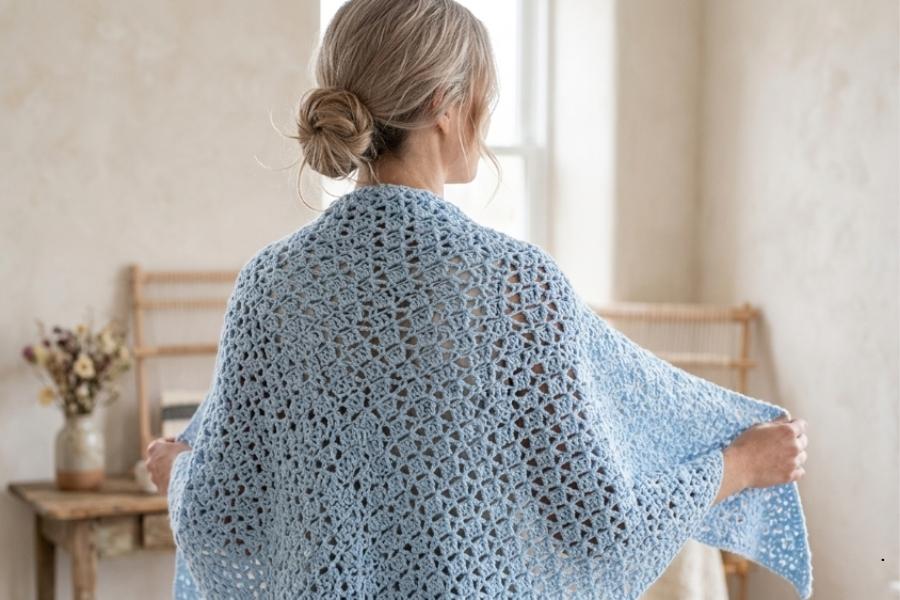
This beginner-friendly project guides you through creating a beautifully textured wrap using an alternating stitch pattern.
Highly customizable in both width and length, this design works up quickly into a soft, cozy accessory. Whether keeping it for yourself or gifting it, you will master the rows with ease.
Materials and Tools
Before beginning your project, gather the following necessary supplies:
- Yarn: 872 yards of medium worsted weight (number 4) yarn. The example uses four balls of acrylic yarn (218 yards per ball) in a sky blue shade.
- Crochet Hook: 6 mm (Size J) hook.
- Scissors
- Tapestry Needle
- Tape Measure: Extremely helpful if you plan to modify the default dimensions of the wrap.
Stitch Multiples and Foundation Chain
To adjust the size or scale the width of your project, use the stitch multiple of 4 + 1. This allows you to easily change the starting chain while keeping the stitch count correct. Adjustments can be made in increments of 4 chains before adding 1 final chain at the very end.
For the standard width featured in this guide, create a foundation chain as follows:
- Form a slip knot by wrapping the yarn around your fingers to make a loop, bringing the yarn behind the loop, and pulling it through with your hook. Tighten gently.
- Complete a total of 61 chains by wrapping the yarn around the hook and pulling it through the loop.
Row One
- Count to the sixth chain away from your crochet hook (the loop currently on your hook does not count).
- In this sixth chain, work a V-stitch: yarn over, insert your hook, pull up a loop, yarn over and pull through two loops, yarn over and pull through the remaining two loops (first double crochet). Chain 2, then work a second double crochet into that exact same chain space.
- Skip the next 3 chains. In the following chain, work another V-stitch (double crochet, chain 2, double crochet).
- Repeat this sequence across the row: skip 3 chains, then work a V-stitch in the next chain.
- Continue until only 3 chains remain at the end of the row. Skip 2 chains, and place exactly 1 double crochet into the very last chain to finish the row.
Row Two
- Chain 3 and turn your work.
- Locate the first chain-2 space in the center of the previous row’s first V-stitch.
- Work 4 double crochets directly into that chain-2 space to fill out the V-shape.
- Move to the next V-stitch and work 4 double crochets directly into its chain-2 space.
- Repeat this pattern across the entire row, placing 4 double crochets in each V-stitch center.
- To finish the row, work 1 final double crochet into the open space created by the turning chain from the previous row.
Row Three
- Chain 4 and turn your work. This extra chain helps form the structure for the first edge V-stitch.
- Work 1 double crochet into the first space located between the very first double crochet of the row and the first 4-double-crochet grouping. This creates an initial V-stitch on the edge.
- Skip over the next grouping of 4 double crochets. In the space directly between that grouping and the next one, work a V-stitch (double crochet, chain 2, double crochet).
- Repeat this across the row, placing a V-stitch into every space between the 4-double-crochet groupings.
- After the final grouping, locate the turning chain space. Finish the row by working a double crochet, a chain 1, and 1 more double crochet all into that turning chain space.
Row Four
- Chain 3 and turn your work.
- Work 2 double crochets directly into the small chain-1 space created at the end of the previous row.
- Move to the next V-stitch and work 4 double crochets into its chain-2 space.
- Repeat the process of placing 4 double crochets into each chain-2 space all the way across the row.
- When you reach the final turning chain space at the edge, work exactly 3 double crochets into that space to finish the row.
Row Five
- Chain 3 and turn your work.
- Skip the first 3 double crochets from the previous row.
- In the space between the edge cluster and the next 4-double-crochet grouping, work a V-stitch (double crochet, chain 2, double crochet).
- Continue placing a V-stitch into every single space between the 4-double-crochet groupings across the row.
- To finish the row, place exactly 1 double crochet into the final turning chain space.
Pattern Repeats and Finishing
To grow your wrap, continuously repeat Rows 2 through 5 in sequence. Keep repeating these four rows until the fabric reaches your desired length or until you run out of yarn. Ending your project on a Row 2 or Row 4 repeat gives the piece a solid, clean structural edge.
Once your piece reaches its final size, fasten off and secure the yarn:
- Cut your yarn, leaving a tail of several inches for weaving.
- Wrap the yarn around your hook and pull it completely through the remaining loop, tugging firmly to tighten the knot down.
- Thread the yarn tail onto your tapestry needle. Pass the needle in one direction through the base loops of your stitches, then pull through. Turn and guide the needle back in the opposite direction through nearby loops to lock the tail securely into place. Trim any remaining excess yarn.
Yarn Selection and Fiber Characteristics
Choosing the right material drastically alters the drape and overall warmth of your finished piece. While standard acrylic worsted weight yarn provides structural stability and excellent stitch definition for the V-shapes, trying a premium wool blend or a soft cotton variant will completely transform the accessory’s weight, breathability, and seasonal utility.
Blocking Techniques for Open Stitches
Because this specific stitch pattern features alternating sections of dense clusters and open spaces, the fabric can sometimes pull unevenly while on the hook. Utilizing proper post-project blocking—such as wet blocking or gently steaming the finished fabric—relaxes the tension, opens up the chain spaces evenly, and gives the edges a highly professional, uniform appearance.
Organizing Multi-Ball Yarn Transitions
When working on large accessories that require multiple skeins or balls of yarn, planning your color or ball changes at the outer margins rather than in the middle of a row makes hiding yarn tails much simpler. Tying stable, low-profile knots or using seamless joining methods ensures the integrity of the lace-like stitch spaces remains uncompromised.
The below video contains all the steps you need to complete this beautiful wrap successfully.