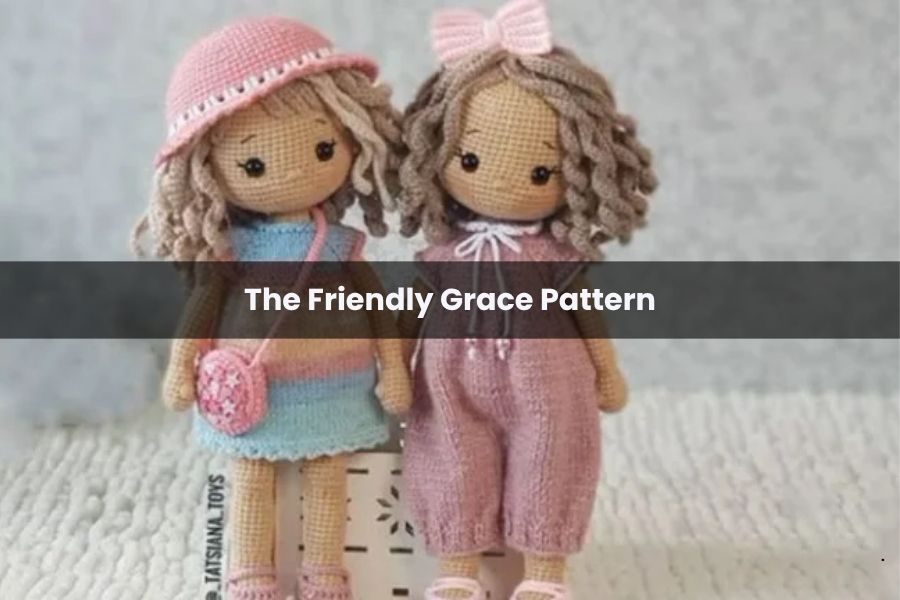
The Friendly Grace Pattern
There is something truly special about making a handmade doll. Whether you are gifting it to a little one or keeping it for your own shelf, this “Friendly Grace” doll has a gentle charm that makes the hours of stitching so rewarding. I’ve put together this detailed walkthrough to help you bring her to life, stitch by stitch.
Getting Ready: Your Toolkit
Before we start, let’s make sure your craft bag is stocked. You’ll want your materials nearby so you can get into that cozy crochet flow.
- The Yarn: You’ll need about 150g of Size 4 (Medium/Worsted) yarn for the body. Don’t forget to grab some extra yarn in fun colors for her hair and her outfit!
- The Hook: I recommend using a 3.5mm or 3.75mm crochet hook. This keeps your stitches nice and tight so the stuffing doesn’t peek through.
- The Essentials: A good tapestry needle is a must for sewing her arms on and weaving in those pesky ends.
- The Fluff: High-quality stuffing (poly-fill) is what gives Grace her huggable shape.
A Note on Measurements
If your tension is like mine, your Grace will end up roughly with these proportions:
- Legs: 18 stitches around; 28 rounds long.
- Body: 42 stitches around at the widest point; 22 rounds tall.
- Head: 54 stitches around at the crown.
Common Abbreviations
- SC: Single Crochet
- SC INC: Single Crochet Increase (2 SC in one stitch)
- INV DEC: Invisible Decrease (use the front loops only for a smoother finish)
- Magic Circle: My favorite way to start—it keeps the center hole perfectly tight!
Step 1: The Legs
We’ll start from the bottom up. We need two of these!
Leg 1:
- Round 1: Start with a magic circle, SC 6. (6)
- Round 2: SC INC in every stitch. (12)
- Round 3: [SC, SC INC] around. (18)
- Rounds 4-10: SC in each stitch. (18)
- Switch to your skin color yarn here.
- Rounds 11-38: SC in each stitch. (18)
- Fasten off and set aside.
Leg 2: Repeat the exact same steps as Leg 1, but do not fasten off! We are going to use the working yarn from the second leg to join them together.
The Big Join (Round 39): Chain 3, then SC into the next stitch of Leg 1. Work your way around that first leg, SC into the 3 chains you just made, and then SC all the way around the second leg. You should now have 42 stitches in total.
Step 2: The Body
Now that Grace has her legs, let’s build her torso.
- Rounds 40-60: SC in each stitch around. (42)
- Styling Tip: If you want her to have a built-in dress, switch to your dress color at Round 41!
- Switch back to skin color for the chest and shoulders.
- Round 61: [SC 4, INV DEC] around. (35)
- Pro Tip: Do this first skin-color row in the Back Loops Only for a really clean “neckline” look.
- Round 62: [SC 3, INV DEC] around. (28)
- Round 63: [SC 2, INV DEC] around. (21)
- Round 64: [SC 1, INV DEC] around. (14)
- Round 65: SC in each stitch. (14)
- Continue with INV DEC until you have 12 stitches left. Do not fasten off; the head begins right here!
Step 3: The Head
This is where Grace’s personality really starts to show.
- Round 1: [SC, SC INC] around. (18)
- Round 2: [SC 2, SC INC] around. (24)
- Round 3: [SC 3, SC INC] around. (30)
- Round 4: [SC 4, SC INC] around. (36)
- Round 5: [SC 5, SC INC] around. (42)
- Round 6: [SC 6, SC INC] around. (48)
- Round 7: [SC 7, SC INC] around. (54)
- Rounds 8-23: SC in each stitch. (54)
- The Eyes: Place your safety eyes between Rows 15 and 16, about 9 stitches apart.
- Round 24: [SC 7, INV DEC] around. (48)
- Round 25: [SC 6, INV DEC] around. (42)
- Round 26: [SC 5, INV DEC] around. (36)
- Round 27: [SC 4, INV DEC] around. (30)
- Round 28: [SC 3, INV DEC] around. (24)
- Round 29: [SC 2, INV DEC] around. (18)
- Round 30: [SC 1, INV DEC] around. (12)
- Round 31: INV DEC all the way around. (6)
- Fasten off. Leave a long tail so you can sew the top hole closed and use the extra yarn to embroider a cute little nose!
Step 4: The Arms (Make 2)
Keep these light on the stuffing so they rest naturally against her body.
- Round 1: In a magic circle, SC 6. (6)
- Round 2: SC INC in each stitch. (12)
- Rounds 3-28: SC in each stitch. (12)
- If you want sleeves: Stop at Row 23 with the skin color, then switch to your dress color for the final 5 rounds.
Final Assembly: Lightly stuff the arms and sew them to the sides of the body between Rows 62 and 63.
Give her some hair, a little smile, and your Friendly Grace is ready for her first adventure! Happy crocheting!