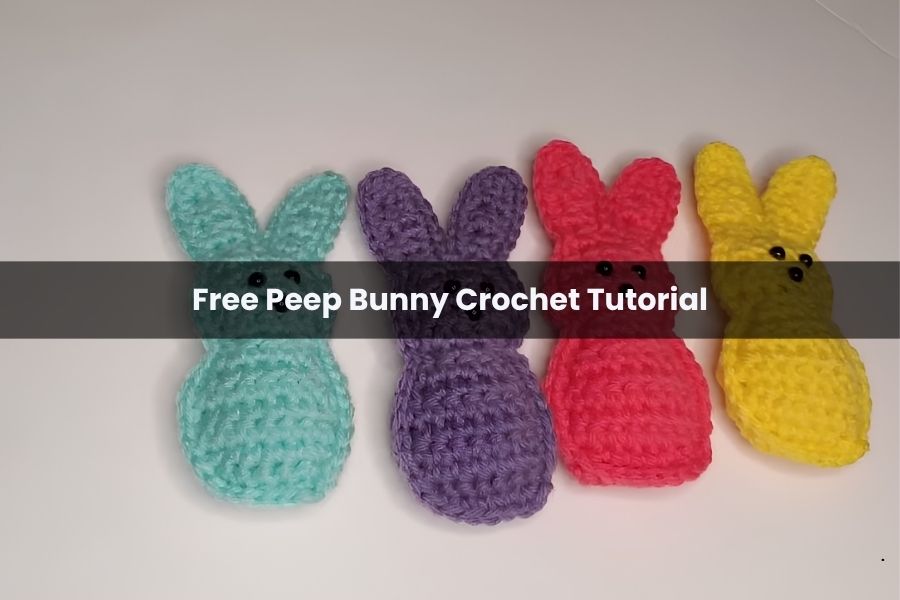
Free Peep Bunny Crochet Tutorial
Bring a touch of sweetness to your seasonal decor with these adorable crochet Peep Bunnies. This project is perfect for using up scrap yarn and creating a collection of colorful, “plump” friends. Each bunny is constructed by making a front and back panel, which are then stitched together and lightly stuffed for a soft, 3D effect.
Materials & Essentials
- Yarn: Medium-weight yarn in your favorite bright spring colors.
- Hook: Size appropriate for your yarn (commonly 4.0 mm or 5.0 mm).
- Eyes: 6 mm safety eyes (3 per bunny).
- Tools: Poly-fill stuffing, tapestry needle, and scissors.
- Key Stitches:
- SC: Single Crochet
- DEC: Single Crochet Decrease
- INC: 2 Single Crochet in the same stitch
Part 1: The Body Panels (Make 2)
Each bunny requires a front and a back panel. Chain 1 and turn at the end of every row.
- Foundation: Chain 7.
- Row 1: SC in each stitch across. (6 sts)
- Row 2: INC in the first stitch, SC in next 4, INC in the last stitch. (8 sts)
- Rows 3–5: SC in each stitch across. (8 sts per row)
- Row 6: DEC, SC in next 4, DEC. (6 sts)
- Row 7: SC in each stitch across. (6 sts)
- Row 8: DEC, SC in next 2, DEC. (4 sts)
- Row 9 (Start of Head): INC in the first stitch, SC in next 2, INC in the last stitch. (6 sts)
- Row 10: INC in the first stitch, SC in next 4, INC in the last stitch. (8 sts)
- Row 11: SC in each stitch across. (8 sts)
- Row 12: DEC, SC in next 4, DEC. (6 sts)
- Row 13: DEC, SC in next 2, DEC. (4 sts)
Part 2: The Ears
The ears are worked directly onto the top of Row 13.
The First Ear
- Row 14: SC in the first 2 stitches only. Chain 1, turn.
- Rows 15–16: SC in these 2 stitches. Chain 1, turn.
- Row 17: INC in the first stitch, SC in the next. (3 sts)
- Row 18: DEC, SC in the next stitch. (2 sts)
- Row 19: SC in each of the 2 stitches.
- Row 20: DEC across the final 2 stitches. Fasten off with a tail.
The Second Ear
- Turn the work. Join yarn with a slip knot to the first unworked stitch of Row 13.
- Row 14: SC in the 2 remaining stitches of the head. Chain 1, turn.
- Rows 15–16: SC in these 2 stitches. Chain 1, turn.
- Row 17: INC in the first stitch, SC in the next. (3 sts)
- Row 18: DEC, SC in the next stitch. (2 sts)
- Row 19: SC in each of the 2 stitches.
- Row 20: DEC across the final 2 stitches. Fasten off.
Note: Use a tapestry needle to weave in all tails on both panels before moving to the assembly phase. This ensures a clean finish inside the bunny.
Part 3: Face & Assembly
Creating the Face
Using the 6 mm safety eyes, create a small triangle in the center of the head on the front panel only. Place two eyes for the top and one for the nose, then secure the safety backs firmly.
Joining the Pieces
- Alignment: Place the front and back panels together (wrong sides facing in).
- The Border: Join your yarn with a slip knot in the bottom right corner. Work SC stitches through both layers to join them.
- Contouring: To keep the bunny’s iconic shape, use slip stitches instead of SC at the narrowest points:
- The “neck” indentation.
- The bottom of the ears where they meet the head.
- The valley between the two ears.
- Ear Tips: At the very top of each ear, work [SC, Chain 1, SC] into the tip to create a slightly pointed finish.
Stuffing
Before closing the final side of the body, pause to add a light amount of stuffing.
- Pro Tip: Don’t overstuff. The goal is a slightly 3D, “plump” look. If you stuff too tightly, the filling may show through the stitches. Move the stuffing around the eyes once they are inside to ensure they sit flat.
Finishing
Complete the SC join around the remaining edge. Slip stitch into the first border stitch to close. Fasten off and weave in the final ends. Your crochet Peep Bunny is ready for a basket!