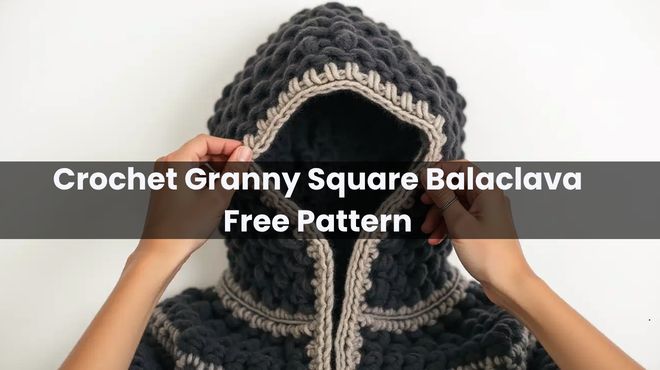
Crochet Granny Square Balaclava Free Pattern
The beauty of the classic granny square is that it never truly goes out of style—it just finds new ways to keep us warm. This Granny Square Balaclava is the perfect marriage of vintage charm and modern streetwear. It is one of my favorite projects for “stash busting” because you can use up all those gorgeous yarn scraps to create something completely unique.
Whether you’re making a colorful version for a festival or a solid, moody tone for a winter hike, this piece is as fun to make as it is to wear.
What You’ll Need
One of the best things about this pattern is its versatility. You don’t need much to get started!
- The Yarn: Approx. 135g of Weight 4 (Medium) yarn. This is where those leftovers from other projects can really shine.
- The Hooks: A 5.00mm for the main body. If you like a snugger, ribbed fit around the neck or face, keep a 4.00mm handy.
- The Basics: Scissors and a darning needle for weaving in those ends.
Finding Your Perfect Fit
Since crochet stretches, these measurements are a great guide for a comfortable fit:
- Children: Aim for 3.5″–4″ squares.
- Adults: 5″–5.5″ squares (5″ is usually perfect for a standard 22″ head).
- Extra Roomy: 5.5″–6″ squares.
The Cheat Sheet
- Ch: Chain
- St(s): Stitch(es)
- Sl St: Slip Stitch
- Sc: Single Crochet
- Dc: Double Crochet
- MR: Magic Ring (The secret to a center without a hole!)
- BLO: Back Loop Only (Great for adding that ribbed look).
Let’s Make the Squares
You will need to make four squares in total. Here is how to work each one, round by round:
Round 1: The Heart of the Square
- Start with a Magic Ring (MR).
- Ch 3 (this counts as your first Dc). Work 3 more Dc into the ring.
- *Ch 2, work 4 Dc into the MR; repeat from * two more times.
- Ch 2, then Sl St into the top of your starting Ch 3.
- Pull that magic ring tight—it’s so satisfying to see the center close up!
Round 2: Building the Corners
- Ch 3 (counts as 1 Dc).
- Dc into the next 3 Sts.
- The Corner: In the Ch-2 space, work (2 Dc, Ch 2, 2 Dc).
- *Dc into the next 4 Sts, then work the corner (2 Dc, Ch 2, 2 Dc) in the next space; repeat from * until the end.
- Sl St into the top of the Ch 3 to close.
Round 3: Watching it Grow
- Ch 3 (counts as 1 Dc).
- Dc into the next 5 Sts.
- Work your corner (2 Dc, Ch 2, 2 Dc) into the next Ch-2 space.
- *Dc into the next 8 Sts, work your corner; repeat from * until you have 2 Sts left.
- Dc in those last 2 Sts, then Sl St to the top of the Ch 3.
Round 4: Getting Closer
- Ch 3 (counts as 1 Dc).
- Dc into the next 7 Sts.
- Work your corner (2 Dc, Ch 2, 2 Dc) into the next Ch-2 space.
- *Dc into the next 12 Sts, work your corner; repeat from * until 4 Sts remain.
- Dc in those last 4 Sts and Sl St to close.
Customizing the Size
If you need your square a bit bigger or smaller, it’s easy to adjust:
- To go bigger: Just keep going! For every new round, you’ll simply add 4 more Dc between your corner spaces.
- To go smaller: Stop after Round 3 or 4, or switch to a smaller hook.
Tip: Usually, a 5″ square is finished by Round 5 or 6, while a 6″ square takes another round or two.
Seaming & Finishing
Once you have your four squares finished and your ends woven in (I know, weaving is the chore, but it’s worth it!), it’s time for assembly.
- The Layout: Arrange your squares into the balaclava shape (three for the head/sides and one for the front/chin area).
- The Seam: Use your darning needle and a length of yarn to join them. I personally love the Invisible Join—it makes the seams disappear and keeps the focus on your beautiful stitches.
- The Polish: If you want a more finished look, you can add a row of sc or dc around the face opening and the bottom of the neck.
There you have it! A handmade, cozy accessory that’s equal parts nostalgic and trendy. Put it on, head out, and enjoy the warmth!