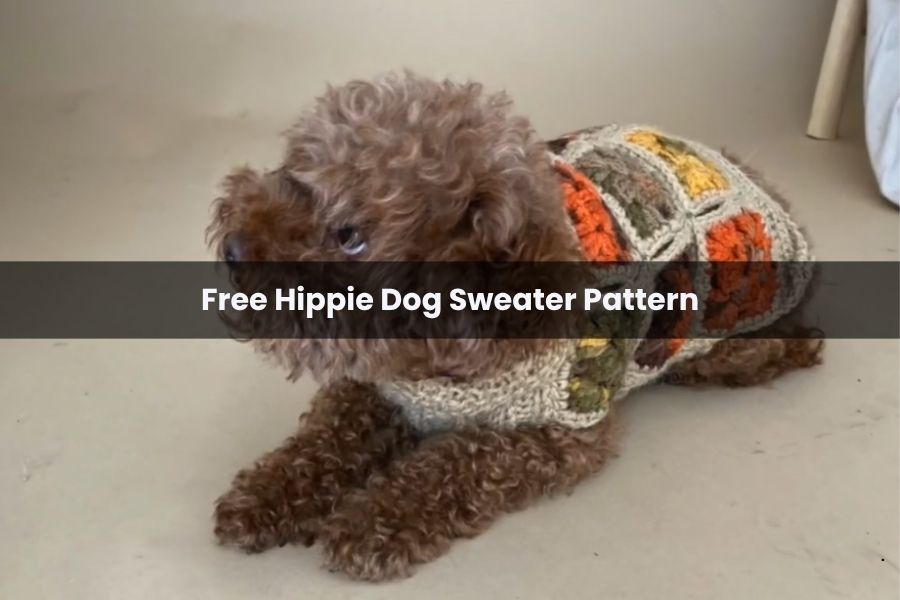
Free Hippie Dog Sweater Pattern
Get ready to turn your furry best friend into the coolest pup at the park! If your dog has a bit of a free spirit (or just loves a good nap in the sun), this Free Hippie Dog Sweater Pattern is exactly what you need. It’s colorful, nostalgic, and uses classic granny squares to create a comfortable, boho-chic look.
What You’ll Need
To get that soft, earthy feel, I highly recommend a yarn with some depth.
- The Yarn: Lion Brand Heartland. It’s an Aran weight (8 wpi) that has beautiful heathered tones perfect for that “hippie” vibe.
- The Hook: A 6.0 mm (J) crochet hook.
- The Extras: A trusty yarn needle for sewing your squares together.
Finding the Right Fit
Before you start, give your pup a quick measure to see which size will be the most comfortable:
| Measurement | Small (S) | Medium/Large (M/L) | 1X/2X |
| Neck Circumference | 12.5″ (32 cm) | 15.5″ (39.5 cm) | 16.5″ (42 cm) |
| Finished Chest | 18″ (45.5 cm) | 22.5″ (57 cm) | 27″ (68.5 cm) |
| Finished Length | 14″ (35.5 cm) | 20″ (51 cm) | 21″ (53.5 cm) |
The Basics (U.S. Terms)
We’ll be using these common stitches:
- sc: Single crochet
- hdc: Half double crochet
- st(s): Stitch(es)
- ch: Chain
- sl st: Slip stitch
- Rep: Repeat
Let’s Get Stitching!
Step 1: The Granny Square Motifs
The heart of this sweater is the granny square. You’ll be making several of these to build the back and the underpiece.
- The Foundation: Start with a magic ring or a small chain loop—whichever you find most comfortable.
- Building the Square: Work in rounds, starting each with a chain. Use your sc and hdc to build the base.
- The “Hippie” Texture: Typically, you’ll work clusters of 3 double crochets into the chain spaces, separated by chains. Use those chain spaces to turn the corners and make your square… well, square!
- Closing: Always finish your round by joining with a sl st to your first stitch.
Pro Tip: Check your size requirements! You’ll need to make enough squares to cover both the back and the belly of your dog. The larger the dog, the more squares you’ll get to crochet.
Step 2: Putting It All Together
This is where the magic happens and it actually starts looking like a sweater.
- Sewing: Lay out your squares for the Back and the Underpiece. Using your yarn needle, sew them together by stitching through the edges. Make sure they align perfectly so the “hippie” pattern stays consistent.
- The Leg Openings: Don’t sew it all the way shut! Following the diagram for your specific size, leave two openings near the sides for your dog’s front legs.
Step 3: Shaping the Top
Now that we have the body, we need to make sure it stays on!
- Neck & Shoulders: Attach your yarn to the top edges of the assembled pieces. Work a few rows of sc and hdc across the edges to form the neck opening.
- The Fit: This step is vital for a good fit. Follow the pattern’s decrease or increase instructions to shape the shoulders so the sweater doesn’t slide off during playtime.
The Finishing Touches
You’re almost there!
- Clean Up: Grab that yarn needle again and weave in all your loose ends. Since dogs can be active (and scratchy!), make sure these are extra secure so they don’t unravel.
- Optional Edging: If you want a really polished look, I like to add one final round of sc or hdc around the very outer edges and leg holes. It ties the whole look together.
- The Fashion Show: Slip it on your pup! Double-check that the neck and chest aren’t too tight.
Now your dog is ready for the next festival—or just a very stylish walk around the block!